


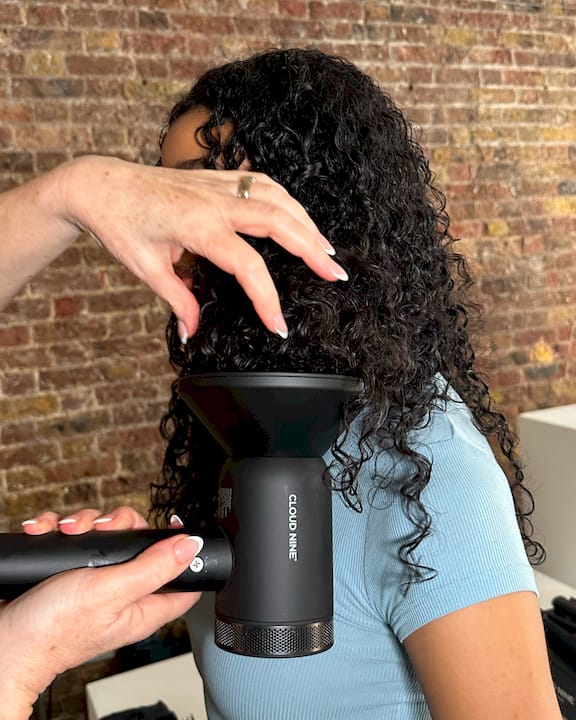
To diffuse wavy hair with minimal frizz, start on very damp, product-prepped hair, use low airflow with a wide bowl diffuser, and dry in small sections until your waves are about 90% set before you touch anything.
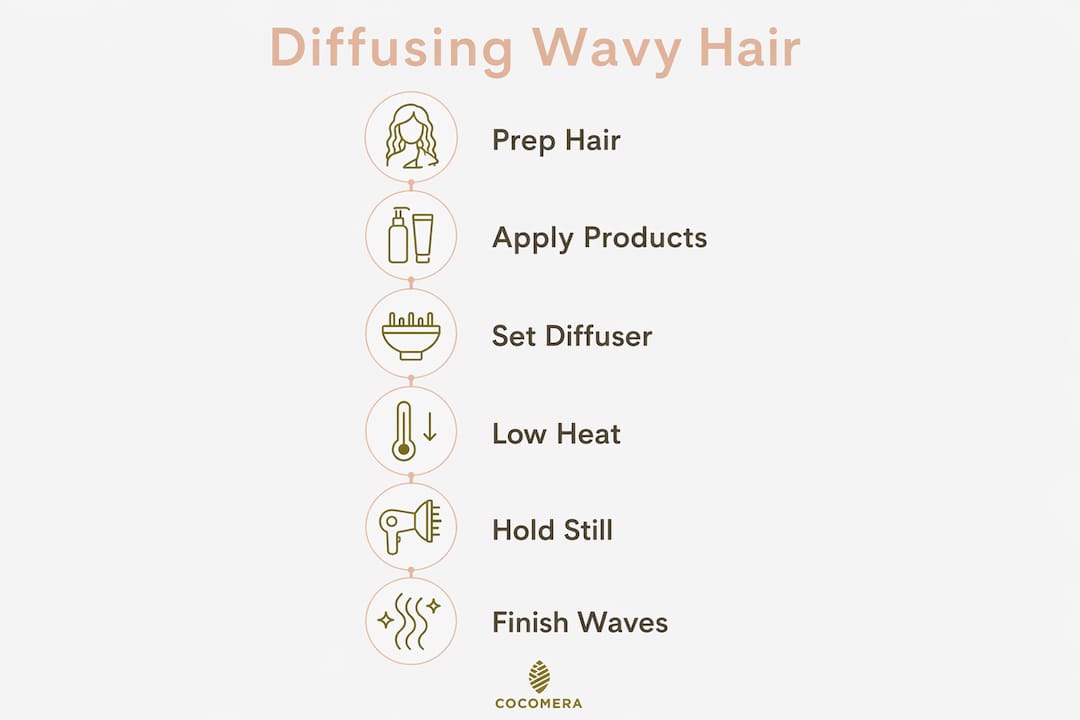
Your quick-start routine:
-
Wash, then blot with a microfiber towel — no rubbing
-
Apply a lightweight leave-in, then a light mousse or flexible gel using a praying-hands motion
-
Add a heat protectant before any dryer contact
-
Set your dryer to low heat and low speed
-
Work in sections: start at the roots, cup each section in the diffuser bowl for 20–40 seconds, then switch the dryer off before lowering
-
Stop when the hair is mostly dry, then leave it alone until fully dry before scrunching out any cast
The reason this works: keeping the hair wet and the airflow soft lets wave clumps set in their natural S-shape instead of getting scattered apart.
Table of Contents
What does diffusing actually do for wavy hair?
Diffusing gives you something air-drying rarely delivers on its own: volume at the roots, defined S-waves, and noticeably less frizz, all in a fraction of the time. The diffuser attachment spreads airflow across a wider surface so it reaches your hair gently rather than blasting individual strands apart.
For type 2 waves specifically, the payoff is real. You get lift at the roots where waves tend to fall flat, more visible wave definition along the lengths, and a style that holds longer than a plain air-dry. Drying time drops significantly compared to letting hair dry on its own, which matters if you’re working with medium to long hair.
Pro Tip: Wavy hair is not curly hair. Avoid over-setting your waves into a stiff, crunchy cast by using less product than a curl routine would call for. Waves need hold, but they also need softness.
How to prep your hair before diffusing
How wet your hair is when you start matters more than most guides admit. You want very damp, not dripping. If water is running down your neck, squeeze it out gently with your hands first, then blot with a quick-dry microfiber towel or a smooth cotton T-shirt. Standard terry cloth is too rough — the looped fibers snag the cuticle and create frizz before you’ve even touched the dryer.
Towel method: squeeze, then blot. Never rub. Rubbing disrupts the wave clumps you just formed in the shower.
Product by wave density:
-
Fine waves: a lightweight foam or mousse applied with praying hands gives lift without weighing lengths down
-
Medium waves: a flexible curl lotion or light gel, scrunched gently upward from ends to roots
-
Coarse or dense waves: a leave-in conditioner first for slip, then a stronger hold gel or cream worked through in sections
Apply everything while hair is still very wet so products distribute evenly. Rake through with fingers, then use a gentle upward scrunch to encourage the wave pattern. The hair plopping method is worth trying here too — it pre-sets clumps before the diffuser even turns on.
Heat protection: always apply a lightweight heat protectant spray or serum before diffusing. Wavy hair cuticles are more vulnerable to heat damage than they look, especially if your waves are fine or color-treated. Olaplex No. 9 Bond Protector Nourishing Hair Serum is a popular option for this step — it doubles as a frizz smoother.
Which diffuser and dryer settings work best for waves?
The diffuser shape matters. A wide bowl with long prongs is the standard choice for wavy hair because it cradles larger sections and lets waves sit inside the bowl without being forced into a shape. Shallow cup diffusers work better for shorter hair or when you’re working with smaller sections.
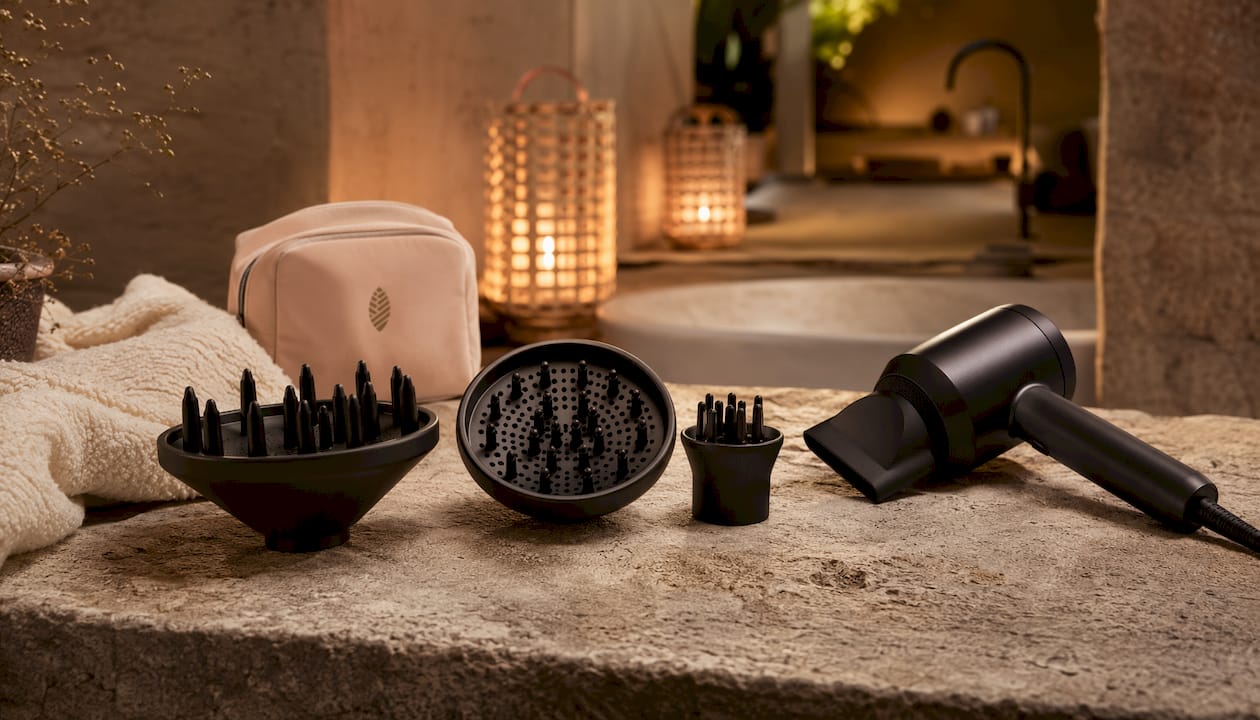
| Diffuser type | Best for | Notes |
|---|---|---|
| Wide bowl with prongs | Medium to long wavy hair | Holds large sections; distributes airflow evenly |
| Shallow cup / sock diffuser | Short or fine waves | Closer contact; good for root volume |
| Universal attachment | Most dryers | Check fit — a loose attachment causes airflow leaks |
On heat and speed: low airflow is almost always the right call for waves. Aveda artists are clear on this — the diffuser’s job is to soften airflow, and if your waves are being blown away, the speed is too high. Start on the lowest speed setting. You can bump to medium if drying is taking too long, but high speed is rarely worth the frizz tradeoff.
For heat, warm (not hot) is the default. Hot air dries the outside of each section fast while the interior stays damp, which leads to uneven results and a puffed-out look at the crown. Low or medium heat takes a few extra minutes but keeps the cuticle smoother.
Pro Tip: Before you start, press the diffuser attachment firmly onto the dryer nozzle and give it a gentle tug. A loose fit lets air escape around the sides, which creates exactly the scattered airflow you’re trying to avoid.
How to diffuse wavy hair: the full step-by-step routine
The routine below works for most type 2 waves. Adjust section size and timing based on your hair’s density and length.
-
Start with prepped, very damp hair. Products applied, heat protectant on, no dripping water.
-
Flip your head forward or tilt to one side. This helps roots lift away from the scalp instead of drying flat.
-
Clip the top half of your hair away if you have dense or long hair. Diffuse the underneath sections first — the interior dries slowest and is most prone to staying damp under a thick exterior.
-
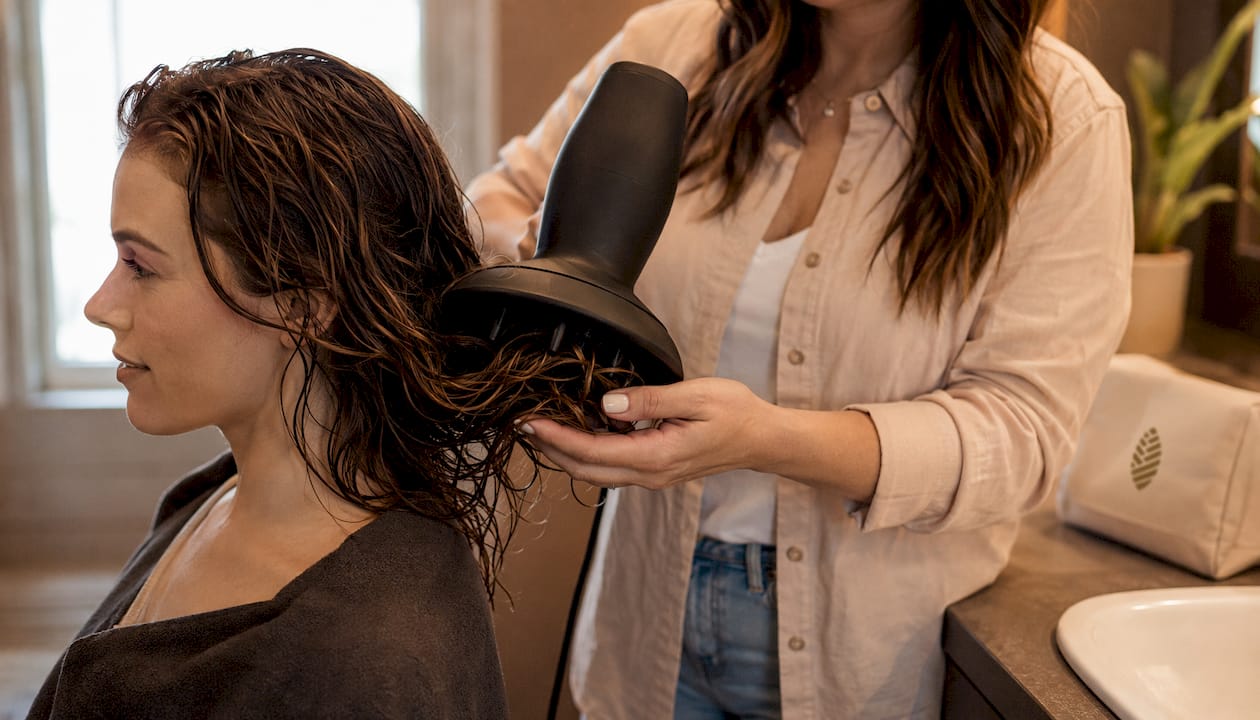
Cup a section into the diffuser bowl. Bring the diffuser up toward your scalp so the hair folds naturally into the bowl. Don’t press hard — just let it sit.
-
Turn the dryer on and hold still for 20–40 seconds. Do not move the diffuser while it’s running. Movement is the most common cause of instant frizz.
-
Switch the dryer off before lowering the diffuser. That burst of airflow as you pull away scatters the wave you just set. Turn it off first, then lower.
-
Move to the next section and repeat. Work your way around the head, then release the top half and repeat the same process.
-
Start with the roots when you reach the top sections — roots take longest to dry and that’s where volume is built.
-
Stop at about 90% dry. Waves should feel set and slightly cool to the touch. Walk away. Touching them now causes frizz.
-
Once fully dry, scrunch out the cast with clean hands or a drop of lightweight oil.
For fine or short hair, the whole process takes a short while. Medium-length, medium-density hair generally requires a moderate amount of time. Long or dense waves may need longer.
Video tip: if you’re learning the cup technique for the first time, watch a short demo before you start. Pay attention to how still the diffuser stays while the dryer is on, and notice how the stylist switches off before moving. That pause is the detail most written guides skip.
Three diffusing techniques and when to use each
Not every technique gives the same result. Here’s how to choose.
Pixie diffusing
You flip your head fully upside down and let hair pile into the diffuser bowl as you bring it up to the scalp. This creates the most shrinkage and the tightest wave definition. It’s great when you want your waves to look their most textured, but it can cause frizz at the roots if your hair is fine. Use a light hold product and work in smaller sections.
Hover diffusing
-
Hold the diffuser a few centimeters from the hair without touching it
-
Works best for fragile wave patterns or very fine hair that gets disrupted by direct contact
-
Roots dry with volume; the wave pattern is preserved without being compressed
-
Takes longer than cupping, but the result is softer and more natural-looking
Cup / scrunch diffusing
Bring the diffuser bowl up to meet the hair, let a section fold in, and hold still. This is the most common technique for type 2 waves and the one described in the main routine above. It sets clumps, adds shape, and works well across most densities. For coarse or dense waves, use larger sections and a flexible gel rather than layering on extra mousse.
For type 2 wavy hair specifically, cup diffusing usually gives the best balance of definition and volume. Hover is worth trying if your waves tend to go poofy at the crown.
Common diffusing mistakes and how to fix them
Using high airflow. The single most common error. High speed scatters wave clumps and creates frizz before the hair has a chance to set. Drop to low speed immediately.
Starting with hair that’s too dry. If you’ve already air-dried for 30 minutes before picking up the diffuser, the waves have set in whatever shape they landed in. Diffuse while hair is still very damp for the best results.
Over-applying product. More product does not mean more definition for wavy hair. Too much creates a rigid, crunchy cast that’s hard to soften without adding frizz. Use less than you think you need and build from there.
Moving the diffuser while the dryer is on. Turn the dryer off before you move. Every time. The airflow blast as you relocate the diffuser is a direct cause of frizz.
Touching waves before they’re fully dry. Even at 90% dry, waves are still fragile. Wait until they’re completely cool and set before scrunching out the cast.
Troubleshooting quick fixes:
-
Frizz at the crown: switch to hover technique for the top sections; reduce speed further
-
Crunchy cast that won’t soften: scrunch with a drop of lightweight oil or a small amount of Curlsmith’s Curl Defining Styling Soufflé after hair is fully dry
-
Flat roots: flip head forward when diffusing roots; use a shallow cup diffuser for more direct contact
-
Stringy waves: you likely have too much product or too little water; try applying products to wetter hair next wash day
Pro Tip: If your waves look great right after diffusing but frizz up within an hour, the culprit is usually humidity plus insufficient hold. Try a light anti-humidity finisher or a stronger gel under your mousse.
Should you diffuse or air-dry wavy hair?
Diffusing wins when you want defined, voluminous waves that last. Air-drying wins when you want the most natural result with zero heat exposure.
Diffusing gives you:
-
More visible wave definition and S-pattern
-
Volume at the roots
-
Faster dry time
-
Longer-lasting style
Air-drying gives you:
-
No heat exposure, which matters for color-treated or fragile waves
-
A softer, more relaxed wave pattern
-
Less effort, but more frizz risk in humid conditions
-
Longer dry time, especially for dense hair
Curlsmith’s guidance frames it simply: air-dry to retain your natural fall and minimize heat; diffuse when you want enhanced texture and a longer-lasting pattern. A useful rule of thumb: if you’re going somewhere and want your waves to look intentional, diffuse. If it’s a low-key day and you have time, air-dry.
How long does diffusing wavy hair take?
| Hair length / density | Estimated diffusing time | Notes |
|---|---|---|
| Short / fine | 20 minutes | Fewer sections; lower density dries fast |
| Medium / medium density | 30 minutes | Standard routine; 2–3 sections per side |
| Long / dense | 40 minutes | Clip-and-section method recommended |
Variables that affect timing: dryer wattage (higher wattage dryers run faster), diffuser bowl size (larger bowls handle more hair per section), and how wet your hair is when you start. Dense waves take longer because the interior sections stay damp under the exterior even when the outside looks dry.
One way to cut time without cutting corners: start with hair that’s very damp but not dripping, and use larger sections for coarse or dense hair. Smaller sections give more precision but add significant time.
How to finish and maintain your waves after diffusing
Once your hair is fully dry and cool, scrunch out the cast. Use clean, dry hands and scrunch upward from the ends. If the cast is stubborn, a small drop of lightweight oil (argan or jojoba) between your palms before scrunching helps break it without adding frizz. Curlsmith’s Shine Define Serum works well here too.
Daily maintenance:
-
Sleep on a silk or satin pillowcase, or loosely pineapple your hair on top of your head with a soft scrunchie before bed
-
Mid-day refresh: mist lightly with water, then scrunch gently upward — no product needed unless waves have completely fallen
-
Avoid touching your hair while it’s drying or in the first hour after diffusing
Pro Tip: Skip the tight elastic. A regular hair tie compresses the wave at the root and leaves a dent that’s nearly impossible to fix without rewetting. Use a loose scrunchie or a claw clip instead.
For more on curly hair drying techniques that complement diffusing, including how to refresh second-day waves, Cocomera’s guide covers the full picture.
Why low airflow preserves wave shape: the science behind it
The core principle is straightforward: a diffuser’s job is to soften and spread airflow, not amplify it. When airflow is too strong, it physically separates wave clumps before they’ve had a chance to set, leaving you with frizz instead of definition.
Aveda artists put it directly: the diffuser reduces and softens airflow to help reduce frizz and encourage wave and curl formation. If your waves are being blown away, reduce the speed. Soft airflow keeps clumped S-shaped bends intact while the hair dries.
The practitioner-backed complement to that: turn the dryer off before moving the diffuser between sections. The blast of uncontrolled airflow as you relocate is one of the most common causes of instant frizz, and it’s entirely preventable. Hold still, switch off, then move.
Pro Tip: Think of diffusing as a setting method, not just a faster way to dry. The goal is to hold each wave clump in place long enough for it to set in its natural shape. Speed and heat are secondary to stillness.
Key Takeaways
Diffusing wavy hair with low airflow on very damp, product-prepped hair and stopping at about 90% dry gives the most defined, frizz-free result.
| Point | Details |
|---|---|
| Start very damp | Hair should be damp, not dripping; blot with microfiber before applying products. |
| Use low airflow | High speed scatters wave clumps; keep speed low and increase only if necessary. |
| Hold still, then switch off | Hold each cupped section for 20–40 seconds, then turn the dryer off before moving. |
| Stop when the hair is mostly dry | Waves need to finish setting undisturbed; touching too early causes frizz. |
| Cocomera styling picks | Browse Cocomera’s leave-in and styling collections for products matched to type 2 waves. |
What actually works for wavy hair — and what the tradeoffs are
The routine most worth recommending for type 2 waves is cup diffusing on low heat with a flexible gel or light mousse, stopped at 90% dry. That combination gives the most consistent results across different wave densities and hair lengths.
Two tradeoffs come up constantly. More shrinkage versus more volume: pixie diffusing gives you tighter, more defined waves but your hair will look shorter. Hover diffusing preserves length and gives a softer result, but the definition is less pronounced. Neither is wrong — it depends on what you’re going for that day.
The second tradeoff is hold versus softness. A stronger gel gives more definition and longevity but leaves a firmer cast that needs to be scrunched out. A lighter mousse or foam gives a softer result straight out of the diffuser but may not last as long in humidity. For most people, the answer is layering: a light leave-in first, then a small amount of gel, then a touch of mousse on top.
The right products make diffusing more predictable
The difference between a frustrating diffusing session and one that actually works often comes down to having the right products at each step. Not more products — the right ones.
At Cocomera, the styling collection is curated specifically for wavy, curly, and coily hair types, which means every product on those pages is there because it works for textured hair, not straight hair with a curl claim on the label. For the prep step, the leave-in collection covers lightweight options that won’t weigh fine waves down. For accessories, detangling tools and sectioning clips are available in the brushes and combs section. Browse the collections, check the product pages for the specific styling items used in demos, and build a routine that fits your wave type.
Useful resources for visual learners
Watching a short demo before your first attempt makes a real difference — seeing how still the diffuser stays and how the dryer switches off before each move is clearer in video than in any written description.
Recommended viewing and reading:
-
How To Diffuse Wavy Hair (Quick Version) — a short-form demo ideal for a first look at the cup technique
-
How to diffuse your wavy hair WITHOUT frizz! — focused specifically on frizz prevention during diffusing
-
How to Diffuse Curly or Wavy Hair | Curl Curriculum — longer format with technique breakdowns and product application
-
Olaplex: How to Diffuse Your Hair for Defined Curls or Waves — brand guide with product-specific tips for heat protection and finishing
-
Curlsmith: How to Diffuse Your Hair — practical technique guide with product recommendations by hair type
-
Cocomera: Hair Diffusers — What They Are and Why Curls Need Them — background on diffuser types and how to choose the right attachment
-
Cocomera: How to Style Type 2 Wavy Hair for Lasting Definition — step-by-step routine focused on type 2 waves with product guidance
-
Tips for Healthier Hair Routines That Actually Work — routine-level advice that extends beyond a single wash day
Check the product pages linked in each demo for the exact styling items used — matching your products to the technique shown gives you the most consistent starting point.


