
If you’ve ever stepped out of the shower with perfectly formed curls, only to watch them dissolve into a frizzy cloud the moment you touched a towel, you’re not alone. Most women with wavy and curly hair unknowingly cause frizz by rubbing or twisting their hair with a regular terrycloth towel. The friction disrupts the curl pattern before it even has a chance to set. Hair plopping is a heat-free drying technique that changes all of that by letting your curls clump naturally while absorbing excess water gently. In this guide, you’ll learn exactly how it works, who benefits most, and how to tailor it to your specific hair type.
Table of Contents
- What is hair plopping?
- How hair plopping works: Step-by-step guide
- Benefits of plopping vs. traditional drying
- Who gets the best results from plopping?
- Tips, pitfalls, and tailoring plopping to your hair
- Our take: Why hair plopping works and why most skip critical details
- Care for and style your curls with curated products
- Frequently asked questions
Key Takeaways
| Point | Details |
|---|---|
| Fights frizz gently | Plopping uses soft fabrics to absorb water and reduce frizz without heat or friction. |
| Enhances curl definition | The technique helps group curls together and boost their natural pattern for more pronounced waves or curls. |
| Works best for types 2-3B | Wavy and curly hair types see the greatest benefit, while coily or short hair may need technique tweaks. |
| Timing is critical | Adjust your plopping time to your hair type for optimal results—too long can flatten waves, too short may leave excess moisture. |
What is hair plopping?
Hair plopping sounds like something you’d do by accident, but it’s actually a very intentional technique with a loyal following in the curly hair community. At its core, hair plopping is a heat-free technique where freshly washed hair is gently laid into a microfiber towel or cotton T-shirt on top of the head and wrapped securely. The goal is to let curls dry in their natural shape without any pulling, stretching, or friction.
What makes plopping different from wrapping your hair in a regular towel? Everything. A standard terrycloth towel has a rough, looped texture that snags the hair cuticle. When you twist or scrunch your hair in one, you’re essentially roughing up the outer layer of each strand, which creates frizz and breaks up curl clumps. Plopping skips all of that by using smooth, gentle fabrics and a specific folding method that cradles your curls instead of disturbing them.
Here’s what the basic process looks like:
- Lay a microfiber towel or old cotton T-shirt flat on a surface
- Flip your wet hair forward so it falls onto the center of the fabric
- Gather the fabric around your hair and secure it on top of your head
- Leave it in place for anywhere from 10 to 60 minutes depending on your hair type
- Unwrap carefully and let curls air dry or diffuse
The technique gained serious traction through online curly hair communities and became a staple in routines inspired by the Curly Girl Method. It works because gravity is no longer pulling wet, heavy hair downward and stretching out the curl pattern. Instead, the curls are stacked on themselves, which encourages clumping and definition.
For anyone exploring curly hair care tips for the first time, plopping is often one of the first techniques recommended. It requires no heat, no special tools beyond a good fabric, and almost no learning curve once you’ve done it twice. The results, especially for wavy and curly hair types, can feel like a complete transformation.
How hair plopping works: Step-by-step guide
The mechanics of plopping are straightforward, but getting the details right is what separates a good plop from a great one. After washing, the full process involves squeezing excess water gently, applying product, flipping your head, piling hair on fabric, wrapping and securing, and keeping it in place for 10 to 60 minutes based on your hair type.
Here’s how to do it step by step:
- Wash your hair and gently squeeze out excess water. Do not rub.
- While hair is soaking wet, apply your leave-in conditioner, curl cream, or styling gel evenly through your hair.
- Lay your microfiber towel or cotton T-shirt flat on a bed or counter.
- Flip your head forward so all your hair falls onto the center of the fabric.
- Gather the back of the fabric up and over your hair, then fold the front up to meet it.
- Twist or tuck the ends to secure the wrap on top of your head.
- Stand upright and let your hair sit in the plop for the recommended time.
- Unwrap slowly and carefully to avoid disturbing the curl pattern.
Timing matters more than most people realize. Here’s a quick reference based on hair type:
| Hair type | Recommended plop time |
|---|---|
| Type 2 (wavy) | 10 to 20 minutes |
| Type 3A | 20 to 30 minutes |
| Type 3B | 30 to 45 minutes |
| Type 3C to 4 | Use with caution, shorter time |
Fabric choice is also critical. Microfiber towels are the gold standard because they absorb water fast without roughing up the hair cuticle. A plain cotton T-shirt is a close second and works especially well for finer curl types. Avoid terrycloth at all costs.
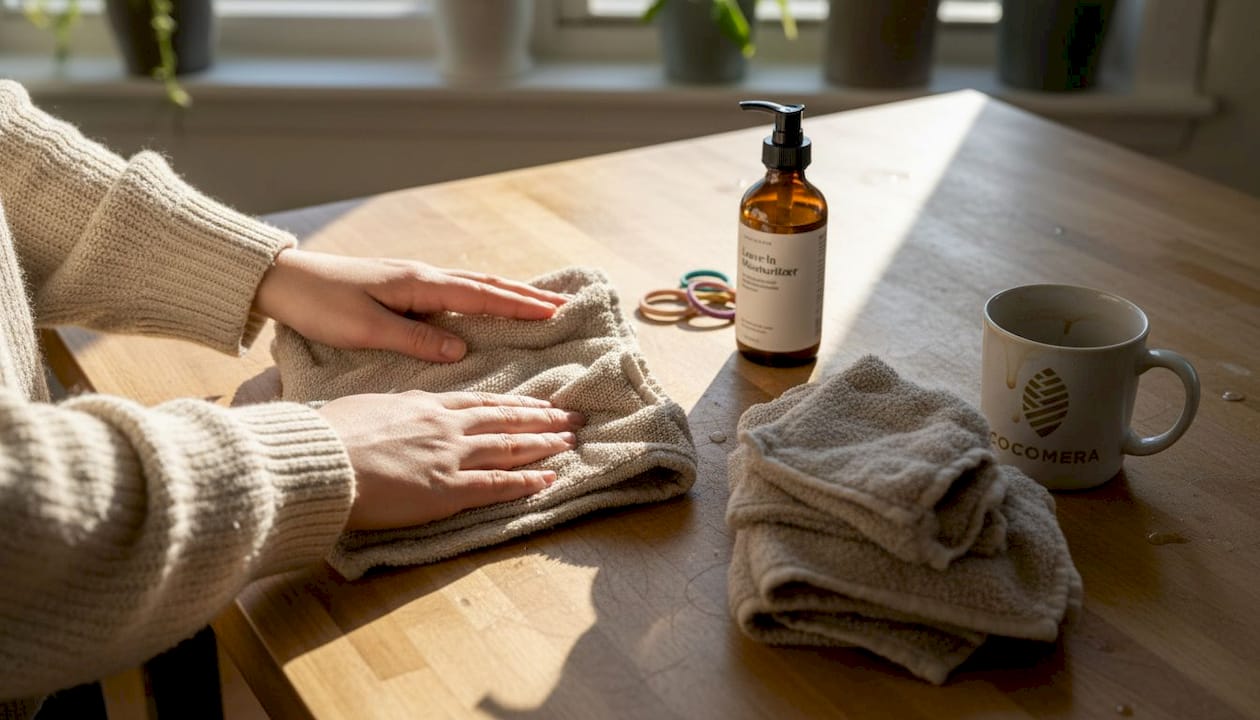
For best results, make sure your hair moisturizers are applied before the plop so they can work into the hair while it dries. A solid curly hair routine will always include product application before plopping, not after.
Pro Tip: Resist the urge to peek or adjust your hair while it’s plopping. Every time you open the wrap and touch your curls, you’re introducing frizz. Set a timer and walk away.
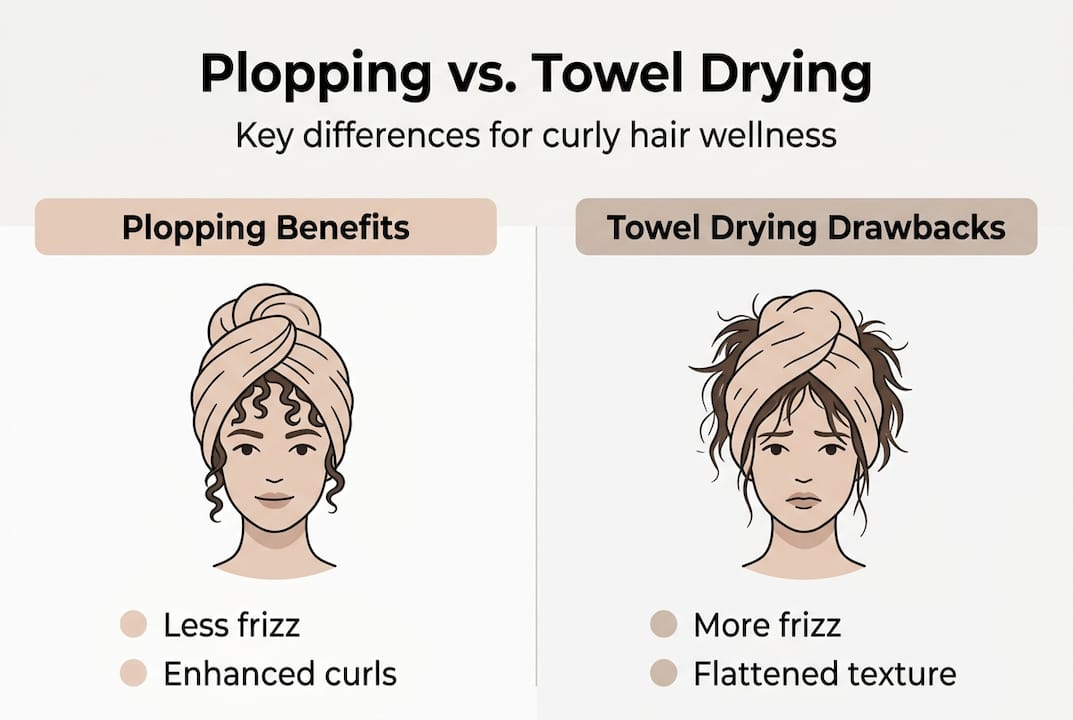
Benefits of plopping vs. traditional drying
Let’s be direct: traditional towel drying is not designed for curly hair. It was designed for straight hair, which can handle friction without losing its pattern. For wavy and curly hair, plopping preserves curl pattern while traditional towel drying stretches hair and creates frizz.
Here’s how the two methods compare side by side:
| Factor | Hair plopping | Traditional towel drying |
|---|---|---|
| Frizz | Significantly reduced | Often increased |
| Curl definition | Enhanced and clumped | Disrupted or stretched |
| Breakage risk | Low | Higher due to friction |
| Heat needed | None | Optional but common |
| Drying time | 10 to 60 minutes | Varies, often longer |
The advantages go beyond just frizz. Because plopping uses no heat and minimal manipulation, it reduces the mechanical stress on each strand. Over time, this means less breakage and more length retention, which is a huge deal for anyone growing out their curls.
Here’s what consistent plopping can do for your hair:
- Improve curl clumping and definition wash after wash
- Reduce the amount of styling product needed to fight frizz
- Shorten overall drying time compared to air drying flat
- Preserve moisture in the hair shaft by reducing heat exposure
- Create more volume at the roots by keeping curls lifted during drying
“The biggest shift for most people is realizing that what they thought was their natural curl pattern was actually frizz caused by their drying method. Plopping reveals what your curls actually look like.”
For anyone who has struggled with wash day results that never match their expectations, the science behind plopping makes it clear why the technique works. It’s not a trend. It’s a smarter approach to drying. If you’re also working on your overall wash day workflow, plopping fits naturally into that system.

Who gets the best results from plopping?
Plopping is not a universal fix, and being honest about that is important. It works brilliantly for some hair types and needs adjustment for others. Type 2 to 3B hair benefits most from plopping, while coarse or thick type 3C to 4 hair may find it less effective without modifications.
Here’s a breakdown of who tends to see the strongest results:
- Type 2 (wavy): Plopping is almost always a game-changer. Waves that used to disappear after drying suddenly hold their shape.
- Type 3A: Excellent results. Curls clump beautifully and frizz drops noticeably.
- Type 3B: Great results with slightly longer plop times. Heavier curl patterns benefit from the extra absorption.
- Type 3C to 4: Results vary. Very coily or thick hair may not absorb enough water in the plop, and the weight of the hair can sometimes flatten roots.
Porosity also plays a role. High-porosity hair absorbs water fast and tends to respond well to plopping. Low-porosity hair resists moisture and may need a shorter plop time or a shower cap variant to avoid over-drying the surface while moisture stays locked out.
For very short hair, plopping can be tricky simply because there isn’t enough length for the fabric to cradle the curls properly. A bonnet or a net can work as an alternative in those cases. For styling type 3 and 4 curls, combining plopping with other techniques like shingling or the LOC method often delivers better results than plopping alone.
Pro Tip: If you have very long or very thick hair, try dividing your hair into two sections before plopping. This helps the fabric absorb water more evenly and prevents the center of your hair from staying too wet.
Overnight plopping is sometimes suggested online, but it comes with real risks. Leaving your hair wrapped for hours can flatten roots and disrupt curl formation. Stick to 20 to 45 minutes for the best shape retention.
Tips, pitfalls, and tailoring plopping to your hair
Even a simple technique has room for error. These are the most common mistakes that prevent people from seeing results with plopping:
- Using a terrycloth towel. This is the number one mistake. The rough texture creates friction that undoes everything plopping is supposed to accomplish. Switch to microfiber or cotton T-shirt fabric immediately.
- Touching hair during the plop. Every adjustment breaks curl clumps and introduces frizz. Wrap it and leave it.
- Skipping product before plopping. Plopping without leave-in or gel means your curls have nothing to hold their shape once the wrap comes off.
- Plopping too long or not long enough. Timing is personal. If your hair comes out soaking wet, plop longer. If it comes out flat or stiff, shorten the time.
For those who want to go further, there are two popular variations worth trying. Wet plopping involves plopping immediately after washing with no product, then applying product after unwrapping. This works well for fine wavy hair that gets weighed down easily. Micro-plopping means gently scrunching a microfiber towel through your hair section by section to remove water before doing a full plop. It’s especially useful for healthy textured hair that tends to hold a lot of water.
If your hair comes out limp or flat after plopping, the issue is usually one of three things: too much product, too long in the plop, or a fabric that’s too absorbent pulling moisture out rather than just excess water. Dial back one variable at a time to find your sweet spot.
Pro Tip: For more advanced plopping tips tailored to different curl patterns, experimenting with plop time in five-minute increments is the fastest way to find what works for your specific hair.
Our take: Why hair plopping works and why most skip critical details
Here’s something most plopping guides won’t tell you: the technique itself is almost foolproof. What isn’t foolproof is the execution. After seeing countless wash day routines go wrong, the pattern is always the same. Someone uses a terrycloth towel because they don’t have a microfiber one yet. Someone skips the gel because they’re in a hurry. Someone unwraps after five minutes because they’re curious. And then they say plopping doesn’t work.
Plopping works. But it requires consistency and attention to the small details that most “quick hack” lists gloss over. The fabric choice is not optional. The product application is not optional. The timing is not optional.
The good news is that once you get it right, you’ll see a real difference within two to four weeks of consistent practice. Your curly hair routine will start to feel less like a gamble and more like a reliable system. That’s the real value of plopping done correctly.
Care for and style your curls with curated products
Getting your plopping technique right is only half the equation. The products you use before and after the plop make a huge difference in your final results.
At Cocomera, we’ve curated a selection of styling products for curly hair specifically chosen for wavy, curly, and coily hair types across all textures. Whether you need a lightweight leave-in for fine waves or a rich curl cream for tight coils, you’ll find options that work with your plopping routine rather than against it. Explore our curly hair treatments to find the right combination for your curl type and porosity level.
Frequently asked questions
How long should I plop my hair?
Type 2 wavy hair needs 10 to 20 minutes; type 3A works best at 20 to 30 minutes, and type 3B benefits from 30 to 45 minutes for optimal curl definition.
Can plopping work for type 4 or very short hair?
Plopping is best for types 2 to 3B; for type 4 or short hair, a bonnet variant or a shorter plop with added moisture tends to deliver better results.
Is it safe to plop overnight?
Overnight plopping risks flat roots and disrupted curl formation, so sticking to 20 to 45 minutes is a safer choice for shape retention.
What products should I use with plopping?
Apply a leave-in conditioner, curl cream, or light-hold gel while your hair is still soaking wet before you plop for the best curl definition and frizz control.


